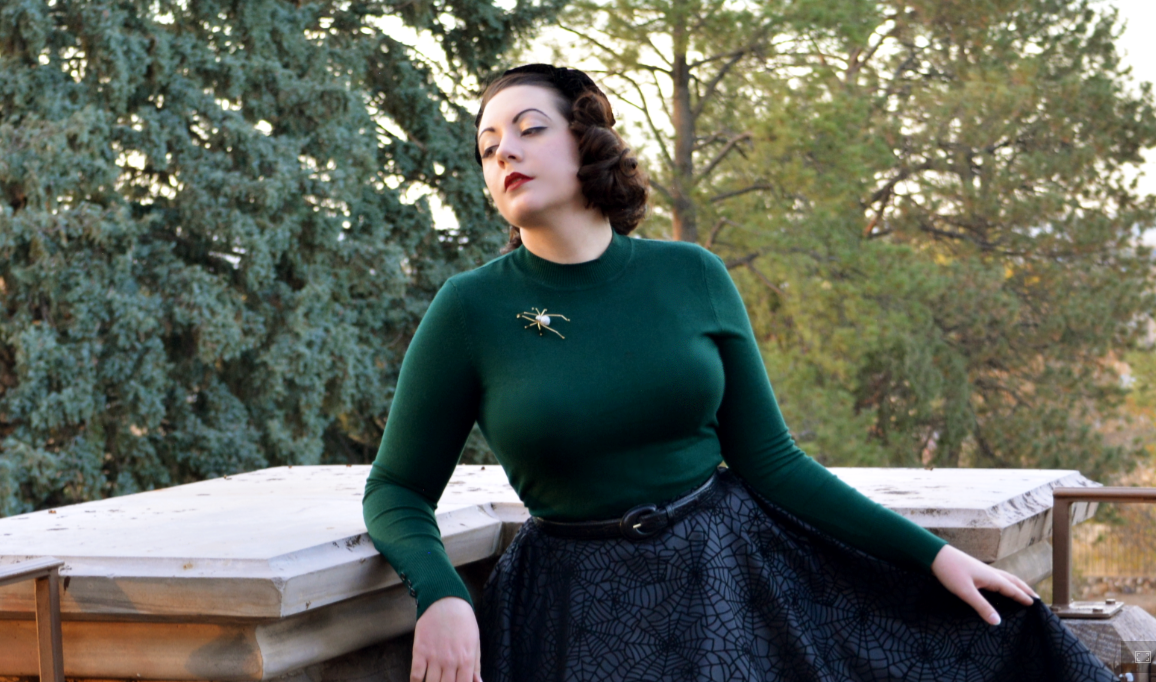
I have written before here on the blog (though briefly) about vintage style bras, but in this weekend's video I decided to outline just what vintage style undergarments I wear and why! I'm sure I have raved about the Bali flower bra and Malco Modes petticoats before, but in case you are still curious about what I wear to achieve a more vintage fit and silhouette, I hope you enjoy this video ;)
Showing posts with label foundation garments. Show all posts
May 28, 2018
Video: Vintage Style Undergarments
I have written before here on the blog (though briefly) about vintage style bras, but in this weekend's video I decided to outline just what vintage style undergarments I wear and why! I'm sure I have raved about the Bali flower bra and Malco Modes petticoats before, but in case you are still curious about what I wear to achieve a more vintage fit and silhouette, I hope you enjoy this video ;)
April 5, 2017
What is a Corset Cover?
![]() |
| 1888 |
It seems that the corset covers of our Victorian counterparts were much like the camisoles we have today. Worn over the corset to smooth over some of the lines from the boning or busk, as a layer of modesty under gowns of more transparent fabrics, and even perhaps as another layer of warmth when central heating had yet to have been invented, corset covers were another essential item of undergarment for Victoria ladies. They also would come in handy if say you wanted to wear a colorful corset with a white gown, which is exactly why I'll be making one!
As I have mentioned, I want to make a frilly white cotton bustle dress this year, but as my late Victorian corset is black, I'll be needing a corset cover to help hide the dark shade of the corset under my future white gown. Having never made such an item before I wanted to do a little research before I cut into some more white cotton and got to work. So what do antique corset covers look like?
![]() |
| MET 1887 |
Well, they look like this mostly! White or ivory cotton, center front buttons, sleeveless, and with varying amounts of lace or eyelet. The seam lines seem to follow the fashionable silhouette of the bodice which would have been worn over them. Perhaps it would work to draft a pattern for such an undergarment using the bodice pattern as a guide, which is what I will be trying out this next week! I have a stash of little shell buttons and white cotton which will be perfect for making such a garment, but I have have to pick up some cotton lace too!
![]() |
| MET 1880s |
![]() |
| MET 1880 |
![]() |
| MET 1889 |
![]() |
| MET 1885-90 |
Have any of you made a corset cover or other Victorian undergarments before? This seems like it will be a simple project but one never knows with costuming! I'll show you my results soon )
November 9, 2016
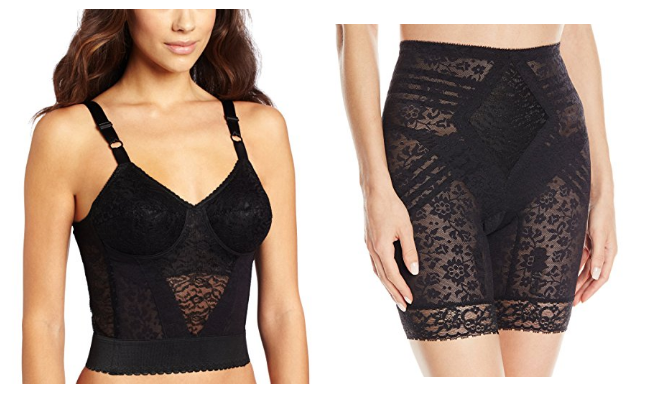
A Mini Review of the Rago Long Line Bra and Matching Girdle
In my ongoing quest to find a great vintage appropriate bra I decided recently to order what seems to be another favorite of the online pin up and vintage scene, the Rago long line.
The Rago long line certainly has a lot going for it, the lace looks pretty and feminine, there is no underwire (and though a DD myself, I found it wasn't missed), and the side smoothing it provides (as seen--well sorta, in the photo above under a thin sweater) is super great. On the less positive side I do find the fabric of the cups to be less soft/comfortable than most other bra's I've owned, the straps are set quite on the middle of the shoulder towards the neck so they would be visible with many necklines, and then despite the straps being set so central the cups definitely separate the girls quite a lot! More than I'm used to at least. The shape of the cups seems less conical/vintage than the Bali Flower and they are set a bit farther apart. Though I like the side smoothing of the Rago long line, I find myself wishing there was a combination of the Bali flower cups and straps with the long line shaping of the Rago. I also feel like the Bali flower also makes look a bit smaller on top, which I appreciate, and the Rago doesn't have the same effect or look to me. Both have the lift to make my waist seem trimmer somehow so that I do like! I think the Rago long line will definitely stay in my lingerie wardrobe, but it is not as super crazy great as I had hoped it would be.
The Rago Extra Firm Shaping Thigh Slimmer (just call it a girdle, honestly) has the same pretty lace styling and matches the long line bra perfectly. The two together provide a very smooth foundation that would be great for bombshell dresses, they give you a very hugged/locked in feel (in a good way?). The thigh slimmer has metal garter clips for wearing stockings which were a nice feature, but the sticky weird gel-ish stuff they add to the underside of the leg openings (to hold up stockings I assume, or just keep things from moving around) does feel odd and I personally am not a fan of that feature. I haven't worn the thigh slimmer out for a full evening or anything yet so I can't really speak to it's longtime comfort, but I would say it is not as comfortable as spanx or the like. It really pairs best with the long line bra and as a set they make a great foundation if not the most comfortable one! Pain is beauty or something like that I suppose ;)
I definitely like both of these Rago pieces, and will get use of both with how often I wear slim dresses. Niether will be my end-of-the-search winners, and I think I'll try the most expensive option yet, the , for my next adventure in vintage style lingerie. What are some of your favorite vintage shaped/styled lingerie options? Let me know in the comments as I am always on the look out!
January 20, 2016
Let's Talk Lingerie
Yes ladies, today I want to talk about underthings, scandalous no? When it comes to wearing vintage fashions, one usually starts with a single dress perhaps, or a classic pencil skirt, and before you know it you're trying to figure out how to store all of your 1940's hats and the best way to hand wash cotton gloves! Once the fever for vintage fashion sets in, it only gets worse (or is that better? it's certainly more fun!). The clothes can only take you so far to looking the part, the accessories on top help, but it's the foundations underneath that really sell the look. So in my quest for a 1940's silhouette, I finally broke down and used my Christmas money to invest in What Katie Did's CC09 1940's reproduction bra.
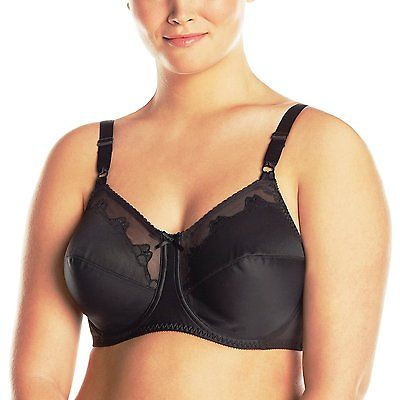
Luckily the first post I came upon was Tasha's (of By Gum by Golly) most excellent thesis on the 1940's bust shape! What an excellent post! Go read it now, she goes into such glorious detail. Tasha explains what to look for when trying to find a 40's shaped bra, not necessarily a retro reproduction, but a modern bra with the same silhouette. I took her most useful advice and ordered myself a Bali Flower bra in my usual size and hoped for the best.
Now you know you're on the right track when people have left negative reviews that a bra is "old fashioned", I read those and thought "oh perfect!". This bra is marketed like any other modern bra, but the shape is perfectly 40's I assure you. Though not the fully conical bullet bra shape, the Bali Flower is definitely bullet-esk; enough that when I put it on underneath just a sweater, the shape was "sweater girl" indeed. My mom laughed (uncontrollably) at me when I went downstairs as the sweater girl and at just how comically "old fashioned" the result was indeed. The look was quite different from anything I was used too, but it certainly gives off the vintage vibe I was after! The Bali Flower has got to be one of the best (and most economical) options for a 1940's shaped bra for ladies with a larger cup size than the repro brands can cater to. Mine fit nearly perfect when it arrived, but to be honest...I don't know if I can go out in just a sweater in this bra because it is just that authentic looking. To rock the bullet shape takes more guts than I currently have! Underneath a dress or structured blouse is no trouble, it's just thinner knits and sweaters where the look is a bit too perky for wearing out of the house! To think I can wear a feathery hat with no trouble, but I'm afraid this bra would really call attention here in suburbia!
While I work up the courage to rock the sweater girl look, I am looking forward to my dresses and suits looking just that little bit more authentic. The other popular modern-but-vintage bra is the Doreen from Triumph, but as it is pricier than the Bali Flower I have yet to order one to try out. The Doreen does come in a better beige color, so I will probably invest in one for summer when lighter colors re-enter my wardrobe.
Do you go for the full vintage look, silhouette and all? I'm still getting used to it! If you have any other recommendations do let me know in the comments!
March 9, 2015
A Finished Victorian Bustle
I told you all about my lobster bustle plans recently, and here is the result! In a fall colored paisley fabric, this is Truly Victorians Imperial Tournure Bustle Pattern, but if you can believe it this is the regular size not the imperial. I imagine the imperial must be enormous!
The pattern for the bustle is great, it goes together very well and is actually a relatively easy garment to make. It looks and feels a bit ridiculous, and I love it! This was the first test wearing of my new chemise too, which worked perfectly with my corset and new bustle. Now all I need is a petticoat and the dress to go on top! I plan to order the fabric for the dress this week, but I will make a muslin for the bodice to ensure a good fit. It feels good to get even a small bit of costuming done, but tomorrow I will be back to finishing up a new 40's inspired hat!
February 15, 2015
Truly Victorian Bustle Plans
I am about to start the next phase in my ongoing bustle dress quest, creating the bustle itself! I have Truly Victorian's Imperial Tournure pattern, though I can't decide if I want to make the regular sized bustle or the larger "imperial" size. How big shall my bustle be? I think I will end up making the regular size, since I can always add another layer of stiffened ruffles on top if I decide I want to go bigger.
I bought a sorta-loud paisley print cotton to make the bustle out of, as paisley is period correct and more fun than making a plain bustle anyway! I have heard that this pattern goes together relatively easily, so hopefully I will be able to show you guys the completed bustle soon!
After the bustle, all I will have left to complete my set of late Victorian undergarments will be a petticoat! I really want to get moving on this costume as I was hoping to have it all done this spring. Sadly I decided to forgo my Your Wardrobe Unlocked competition plans this year. I was going to make a 1920's dress, but I ended up have neither the time nor the extra funds to put into it. Perhaps I will make something for next years contest instead.
I bought a sorta-loud paisley print cotton to make the bustle out of, as paisley is period correct and more fun than making a plain bustle anyway! I have heard that this pattern goes together relatively easily, so hopefully I will be able to show you guys the completed bustle soon!
![]() |
| Lobster bustle and Victorian undergarments, Kyoto Costume Institute |
I do have other costuming plans for the year ahead. After I finish my bustle dress (which I have finally settled on a design for the dress itself hooray!) I want to put together a simple Edwardian ensemble of a shirtwaist and cotton skirt. The outfit will be very Adele Blanc-Sec inspired and should be fun! I also have some violet silk taffeta that is begging to become an 18th century pet en l'air, possibly with a multi-layer gauzy-muslin petticoat. As usual I have grand sewing plans, and not necessarily time to complete them all! We shall see, I'll get back to my sewing room...
February 4, 2015
Finally! A Victorian Chemise
I have been talking about making a Victorian chemise/shift for ages and I finally made one! I was inspired by this chemise from The Aristocrat, which has nice thin straps and a low neckline perfect for evening gowns later on (Yes, I am already dreaming about Victorian evening wear). I drafted the pattern pretty haphazardly but it worked out perfectly in the end. I used a nice lightweight cotton voile in black and added white cotton lace at the neckline (to create the drawstring around the neckline) and around the arm opening.
I am just so glad this chemise is finished! Now I will move onto making the Truly Victorian Imperial Tournure bustle!
December 11, 2014
The Late Victorian Corset: Finished (well nearly)
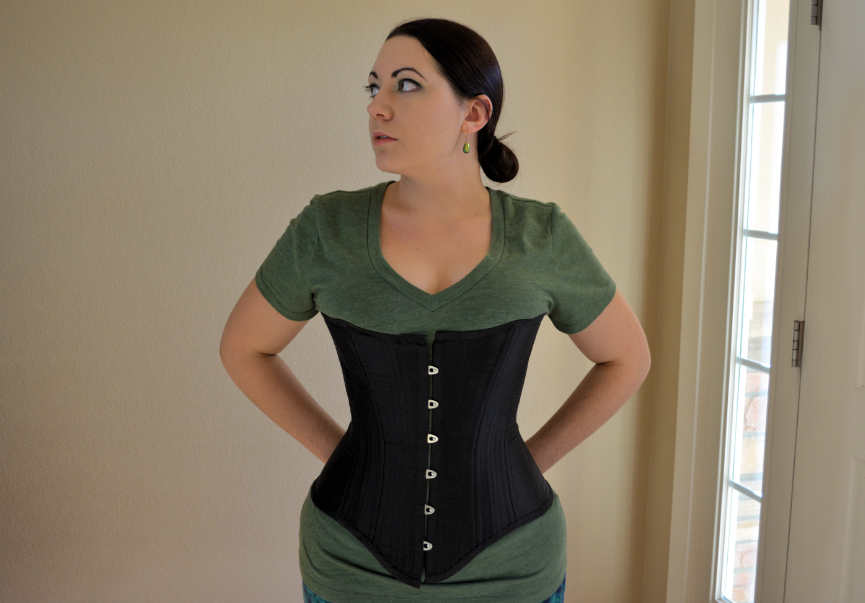
Well here is the corset! I still need to add flossing and some lace, but in general it is finished! I'm relatively happy with it, it is too big in the bust and hip overall, but for my first real Victorian corset I'm happy. I really like the shape this corset creates and it is quite comfortable! I'll make my next one smaller of course, but this corset will be a great starting point for jumping into late Victorian costuming next year.
Next up I'll be making a chemise to wear underneath, and hopefully I'll eventually add flossing and lace to the corset too. Sorry about the casual-ness of these photos but I was so excited it was finished that I just had to show it to you all asap!
December 5, 2014
The Late Victorian Corset: Part 4
The silk bias for the corset has been cut and ironed! Such a basic task, and yet one I have only just gotten to. I can happily report that one half of the corset is finished and bound! I will sew the other half of the binding on tonight and then all I will have left to do is the flossing!
I have been looking into different flossing resources, like this guide from Sidney Eileen and this library of flossing patterns from Foundations Revealed. I still want to use mint green thread on the smooth black silk of the corset for a nice contrast. Sadly I still haven't been able to find a lace trim I like for the top edge, though luckily that can always be added later. I have however bought some lovely vintage mint green silk ribbon for a center front bow!
It feels good to be nearly done with the corset now, though that means I need to make a chemise to wear underneath it!
November 24, 2014
The Late Victorian Corset: Part 3
I have been working diligently on the Victorian corset this week and have made a lot of progress! More progress than I have photos of actually, when you get going sometimes you forget to document these things! I have completed most of the final corset now, I just need to attach the binding and floss the boning channels. I still haven't found a good lace for the top edge, but seeing as that doesn't effect the function of the corset, I can keep looking.
I had hoped to find a herringbone twill to use for the strength layer of this corset, but I could barely find a heavy weight regular twill, let alone a herringbone one. I know I should just buy coutil (fabric specially woven for corsets) but I am impatient and cheap so I have never bothered to spring for it! I ended up going with a mauve-ish colored medium weight cotton twill. I of course didn't care what color the strength layer would be, it was all about finding something strong that wouldn't stretch much. I also bought some twill tape for making additional boning channels inside. Then of course I had to buy the steel boning itself, I ended up getting mostly spiral steel boning and some flat spring steel as they didn't have every pre-cut length I had wanted in the spiral available. I don't usually use spiral steel so I don't mind having this corset be half and half.
Putting the corset together went smoothly and I was pleasantly surprised I remembered how to insert the busk and finish the front edges from making the Edwardian corset last winter. It seems silly now I was so afraid of using busks when they are actually no trouble at all! I have my eye on a busk with gold plated hooks and pins for another corset down the line (magenta with a gold busk and gold flossing!).
As of now, I have inserted the grommets down the back and inserted all of the boning into the channels. The next step is always the most nerve wracking, trying the darn thing on! Luckily, it fits, at least it isn't too small! It isn't really too big either, I just wish I had taken off another inch all around because, drum roll please, the edges do meet in the back when laced up! I had modified the pattern, removing about a half inch, and hoped between doing that and the stiffer fabric everything would have shrunk a bit more, but alas it is still a bit too big. But other than my nit pickyness about the lacing closing, it fits rather well. I am really happy with how the bust area fits/supports the top. The shape it creates is really pretty and will be great for my bustle era projects planned for next year.
Because it is a bit bigger than I would like, I don't have as much waist reduction as I had hoped. Resting I have about a 31" waist and this corset can only take me down to a 29" at best with the back fully closed. I plan on making a second corset for "evening" wear that is smaller and can get down to a 28-27" waist. Even though my waist measurement is not greatly effected by this new corset, it does look much smaller because a corset makes your waist much more round as opposed to the more oval shape of the body naturally. So though the measurement is the same, the shape makes the waist appear smaller. So that's always a nice effect :)
I hope to finish attaching the binding and get going on the flossing this week so that I can show you all the finished corset! I'm off to the sewing room again...
November 17, 2014
The Late Victorian Corset: Part 2
So, when we left off I had discovered the Corsets and Crinolines pattern was exactly 10 inches too small for my measurements. I was all worried that I had a lot of math to do. In actuality, this was the best discovery I could have made because it made re-sizing the pattern very simple! Since proportionally the corset was perfect for me, a 10" difference between the 30" bust and the 20" waist was the same as the 10" difference between my 40" bust and 30" waist. I decide to see if that meant all I had to do was add a half inch to each side of each pattern piece. One inch added per pattern piece, 5 pattern pieces, 5 additional inches per side of the corset equaling the ten extra inches I needed! Easy math is my favorite kind :)
Here is the pattern after I added the 1/2 inch to each side, another 1/2 inch for seam allowance and then 1 inch to the top and bottom of each piece to play with how tall/long the corset would be. I like to be extra methodical with corset making so I don't screw anything up, so you can see I have numbered and highlighted the top of each piece in blue.
Measuring the new pattern resulted in the measurements matching my own quite perfectly. The waist of the first pattern turned out to be a little less than 20", which was fine as I would like the new measurement to be around 28". Some waist reduction is always nice! I decided to dive in and try on a very basic mock-up of my new pattern.
So here is the mock-up. Made of only one layer of thick muslin, I know it is not a perfect representation of how the corset will behave when made of a stronger material. I did add boning at the seam lines, inserted the busk, and added a grosgrain waist tape to approximate some of the final structure. I basically made this mock up to test if the pattern would work at all. Miraculously, to my surprise and delight, it was nearly perfect! The corset fit very well, other than the fact that it closed in the back, which I have to imagine will no longer be the case when it is made out of a stiffer material than the muslin which stretches more than a coutil or twill will. I am hoping when I make the real corset that the thicker and stiffer fabric will mean the whole thing shrinks just a bit. I may take off a 1/4 inch somewhere in the pattern too, just too be sure it doesn't meet in the back. There is nothing wrong with having your corset meet at the lacing in the back, it just isn't as historically accurate and allows less room for adjusting just how tight or loose you want to be laced.
I also redrew the lines at the top and the bottom of the corset, as you can see with a blue marker above. Mostly I had to remove the one inch allowance I had added to the pattern for adjustment.
I know it is a bit of a risk not making a second mock up out of twill (hopefully I can find a herringbone twill) to see just how much a stronger (less stretchy) fabric changes the fit of this corset. The pattern went together so easily that I won't be too terribly bothered if this corset somehow comes out too small or too big and I have to make another. Its not like stay making where you have to sew a trillion straight lines only to afterwards find out something is wrong and it won't fit! That is true frustration!
In fact this corset goes together so easily I am already thinking of making another one if this one works out. I should make a summer corset next but I am leaning towards a bright colored satin instead just for fun! Today I am off to the fabric store to buy twill, boning, and hopefully a nice black cotton lace for the top edge. Look for another corset update later this week!
March 4, 2014
Strapless Stays of Doom
I say of doom because I started sewing these at the end of summer and I just now finished, but also because they have some issues. I finally got to try them on after finishing the hand sewn eyelets down the back and the top of the back edge sticks out oddly from my shoulder blades. I think my options are either to a. cut down the top edge of the back, trim all the boning and reattach the binding or b. add some sort of strap to hold down the top edge to my back. I honestly am loath to do either because I want these to be done! Oh stay making, why must you be so troublesome! I would rather trim the back down and inch or so, but if that doesn't fix the problem I would be so sad to have done all that work for nothing!
These stays are made with three layers, a simple cotton for lining, a cotton twill for stability and a fashion fabric outer layer of jacquard. I had started binding these in the summer with light pink binding but I hated how it looked which is what originally stalled me. I found a few packages of this golden tan bias binding on sale at Denver Fabrics this fall and like the color combination so much more! These are entirely boned with thick cable ties from Home Depot which I think is actually contributing to the way they flare out since the cable ties come rolled and have a natural coil because of it. Other than that, and having to sand the edges smooth, I really like using these cable ties for boning.
This fabric has been in my stash waiting to be transformed into an 18th century something for a long time. I just love the print and the colors so much! I want to construct a jacket, probably something like the costume close up swallowtail jacket because it is just too cute! I'll be constructing the whole thing in the most historically accurate way possible in an attempt to have some actually accurate 18th century costumes for once. I can't help but want to use my sewing machine all the time because I am ever impatient, but this jacket will be a longer term project and challenge to do everything the accurate way! I can't wait to start even though I have other projects to finish first!
January 17, 2014
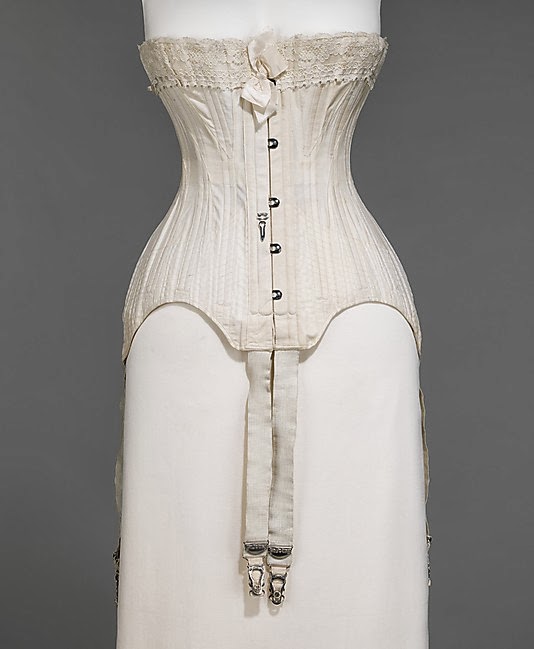
The Edwardian Corset
![]() |
| Corset 1905, MET |
When I first saw the perimeters for this years Your Wardrobe Unlocked competition I knew exactly what era and design I wanted to conquer. I had never attempted Edwardian costuming before and though I have been making corsets of varying degrees of accuracy and success over the last perhaps eight or ten years (yes I learned to sew young), I had never undertook a corset with a busk or with the level of historical accuracy as I was about to attempt. Knowing I shouldn't try and just wing it when it came to the pattern I ordered Truly Victorians 1903 Edwardian Corset pattern. When I had the pattern pieces cut out I was intimidated.
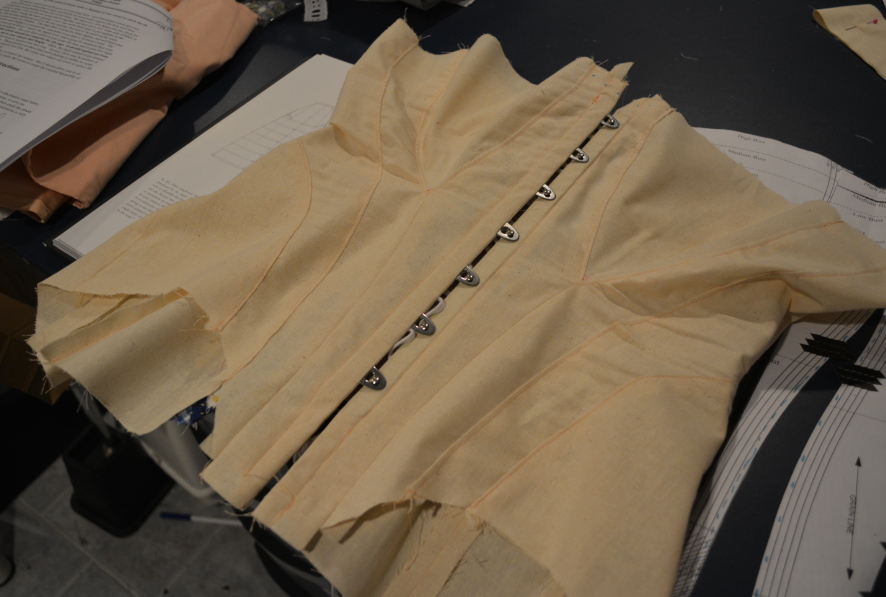
The pattern turned out to be brilliant, the size (size E in my case) was perfect and the instructions were easy to follow as I hung onto every word trying not to screw anything up. I decided to make a mock-up out of muslin to try inserting a busk, as I had never done it before, and to better understand how the pattern fit together so i wouldn't screw up on the real one. This was super helpful and made putting together the real corset so much easier and a bit less nerve racking.
| The muslin corset mock-up |
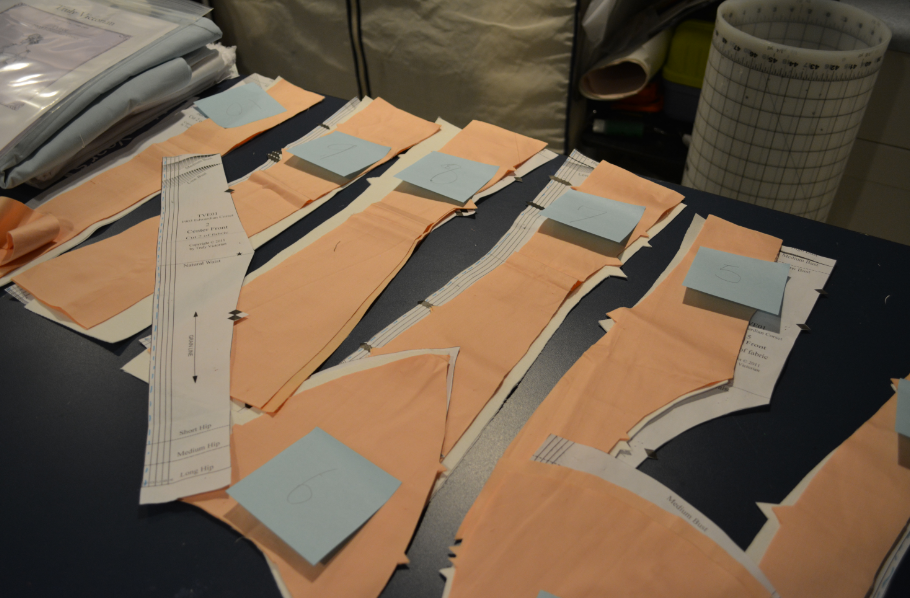
After the success of the mock-up I cut into my real fabrics, a peach cotton sateen that I had gotten for free at school a long time ago and a sturdy cotton twill from Denver Fabrics. I decided to baste these two layers together to make sewing the panels together less evil.
| note my sticky notes numbering the pieces so I didn't get confused |
| by this point I was really loving the peachy sateen, even though I don't normally like the color peach it was just perfect for an Edwardian corset |
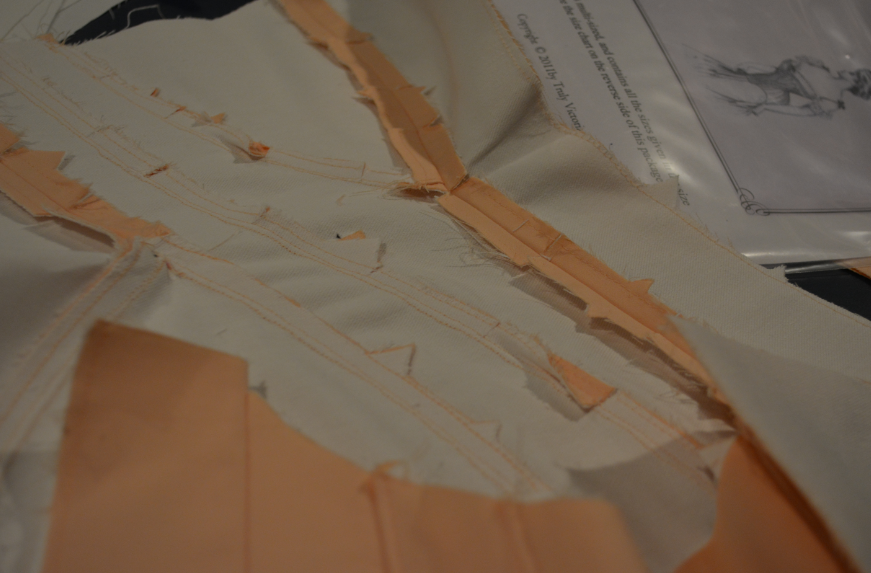
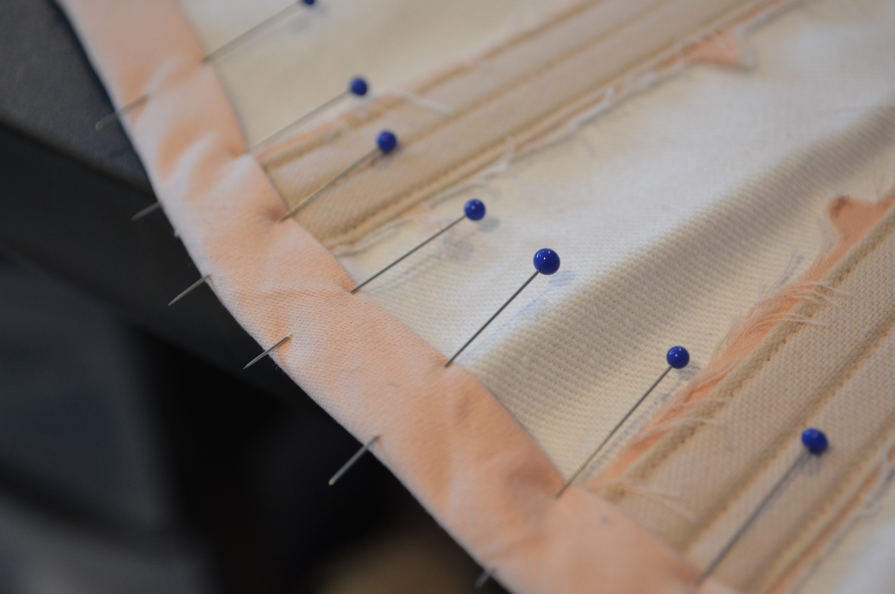
| sewing on the bias binding was satisfying beyond belief knowing I was nearly done! |
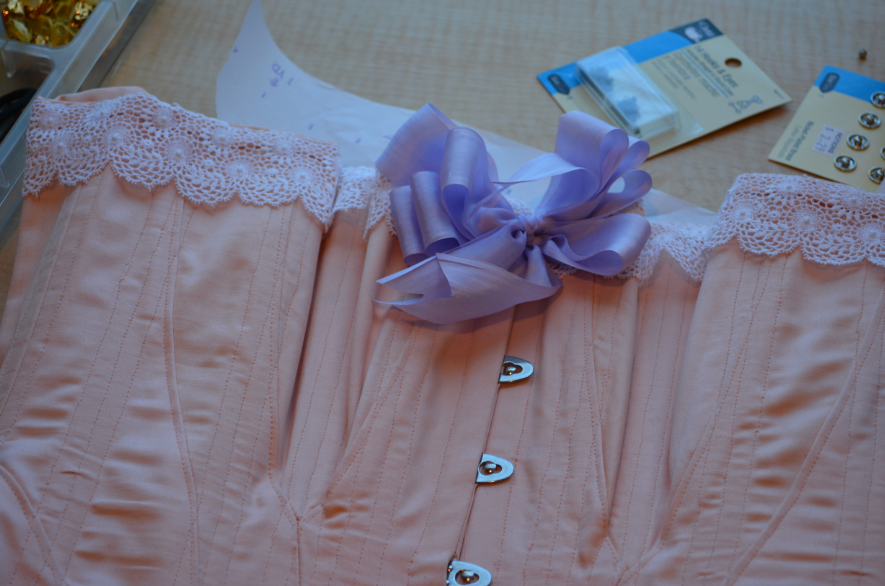
Then suddenly, after two days of careful sewing, the corset was finished! The last steps were finishing the top edge with some pretty cotton lace I found at Denver Fabrics and a gorgeous floaty silk ribbon I bought on Etsy especially for the finishing touch of this corset. I love this corset. Not only am I just super relieved it came out well but it fits perfectly and looks great on, what a fun new silhouette for someone used to 18th century stays! I will have pictures of the finished underwear set for you soon, I managed to finish the corset, chemise/slip and petticoat all in four days and so now I have dove headfirst into the gown to go over-top everything else. This will be my first time entering the contest at Your Wardrobe Unlocked and I am so excited but wish I had given myself more time of course!
Subscribe to:
Posts (Atom)