Showing posts with label embellishment. Show all posts

August 24, 2017

Sequin Swirls


Last winter, being the very clumsy person I am, I slipped on some snow while out getting photos and fell forward pretty hard trying my best to hold onto my camera and keep it from getting damaged. It seemed fine, but now, 6 months later, its clear I messed up the lens a bit. It keeps jumping around and stuttering. At first it was just a little bit, but somehow it has gotten worse recently? I'm not sure if that's why most of the photos from this day came out a bit blurry, but I have no good pictures of this outfit in full length and I do apologize!

I suppose I'll have to take the lens into a camera place and see if its something that can be fixed for less than the cost of just replacing it. Luckily my mom has the same camera and lens so we can shoot with her set up for a while.

Still, even with my darn burgundy hair and less than idea photos, I wanted to finally show you all this sequin and beaded bolero I made this past spring. I made it to wear in Paris, but it was one of the two outfits I didn't manage to shoot while I was there. I still haven't perfected my ideal bolero pattern, but the embellishment turned out just as I had envisioned. I love all black beading and sequins together, and as time consuming as it was sewing each tiny bead on by hand, I actually love diving into a project like this. I cut the pieces of the bolero out first, serged the raw edges and then sketched on my swirling pattern in white pencil. Unlike sheer lightweight fabrics where you can do this kind of embroidery from the back with a tambour hook quite quickly, I had to stitch on the sequins and beads by hand one by one on this opaque and thicker cotton sateen. I sewed it together with a poly lining in matching black once I had finished the embroidery. I'd like to do black on black bead work like this again on another project for sure as I really love the look!

The clear Lucite purse was a birthday gift from my grandparents last month which was a fun surprise! I never expected to have a bag like this because they are so collectible/expensive and I tend to save up for more 1940's things rather than 1950's items. I'm happy to add it to my collection! Plus it goes well with these futuristic but also almost 50's fetishy (I said it) clear and patent leather heels. I love these shoes, I mean, I think they are perfectly Blade Runner and really nicely made...except that they really hurt my feet. So that's a bummer, but look at them! They were from a Masion Margiela and H&M collaboration collection years ago and I anxiously waited for them to go on sale before I snatched up a pair. It's just a shame they are so painful! Beautiful but deadly.

I hope you are all having a good week, my wonderful photographer is away this upcoming weekend so I plan on being a homebody and focusing on sewing, recording videos, and editing the ol' novel the next few days. Well, all that after I go see Depeche Mode on Friday night (!!!). Always so much to do :)

Skirt & Bolero: Made by me
Top: Banana Republic
Shoes: H&M
Handbag, scarf (inside handbag): Vintage
Earrings: Charms from Michaels or Joanns, made by me-ish?

May 5, 2017

Sequins & Stars: Final Thoughts & Tips


So the skirt is finished, as you may have noticed earlier this week! I wanted to wrap up my series of posts about making this skirt with some final thoughts and a few tips for any of you who want to make something similar in the future.

Firstly, the finishing. I didn't put a zipper in this skirt. Nope. I felt like the tulle was too fragile and also that I didn't have to..? A simple slit would work, its not like I would be wearing such a sheer skirt without anything underneath it, and with a circle skirt there was no problem with the slit lying smooth and closed. So once I decided I wasn't going to be putting in a zipper, I just needed to align the layers of tulle and attach the waistband. To do so I carefully laid everything out flat on the floor layer by layer with the embellished layer on the top. I pinned the layers together around the hole in the center of the giant circle (which was the waist of course). Then I basted around this area and removed the pins. Next I had to cut the aforementioned slit to allow me to get in and out of the skirt. Before I even reached for the scissors I pinned down two rows of pins along where I wanted the slit, and then based all the layers together along this thin rectangle area so that when I did cut the slit nothing would move around and all the layers would always remain aligned.


Above you can see the stitches running along the edge of the center back slit. These were put in before I cut the slit! Do this first if you decide to go this zipper-less route like me. I also put several extra stitches across the end of the slit (which is around 8-9" long) so that if the opening got tugged a bit getting the skirt off and on the tulle below wouldn't tear. Rugged clothing for adventure and activity, this skirt most certainly is not ;)

Then I finally cut the slit and attached the waistband I had cut out from spare black cotton sateen just like I would have done for any other skirt. I always add some twill tape in the seam attaching the skirt to the waistband so that it won't stretch out over time and I did the same for this skirt too. Sewing on a skirt hook was the final step and the skirt was finished! That's right, no hemming required, tulle doesn't fray.


I may have sneaked a heavily beaded death star, some sequin TIE fighters, and a sketchy x-wing onto this skirt. I couldn't help it!


So that's how I chose to finish a tulle skirt without having to put in a zipper. My other tips for making a project like this one include: Make sure to embroider in a comfortable position, don't wreck your back! I had the skirt on my drafting table, which is a bit higher than a usual table, and then sat in a chair next to the table so the fabric was at the perfect height to work on without hunching over the skirt and ending up in a lot of pain. Also make sure you have enough of the materials you'll need before you start. I ended up wanting more star shaped sequins and had to run to the craft shop to buy more which slowed me down. I'd recommend laying out your whole skirt and positioning the larger motifs or appliques all at once before filling in the background with sequins or embroidery. That way you can be sure things are evenly placed and nicely balanced. After the larger motifs are in place then go in sections, I focused on about 1/4 of the skirt at a time, when sequining/beading/embroidering so that you don't get overwhelmed by the scale of the task!

I am super pleased with how this skirt came out, but even more pleased that it is finished and I don't have to sequin anything else for a while now! I think I got the embroidery bug out of my system. Give me clean crisp cotton and easy finish-in-one-weekend projects for a while please. I've been working on a simple cotton dress this week and I am excited to hem it this weekend and wear it soon.

I hope all of your projects are going well, have a good weekend everyone!


May 1, 2017

Space Opera


 Not long ago, in a city far far away, I wore my new galaxy inspired tulle skirt to frolic around the most beautiful Palais Garnier opera house. Probably one of my favorite buildings in the world, the angsty Phantom of the Opera obsessed young teen version of me would have died to have stood outside. This was my third or fourth visit to the facade, and what a grand facade it is too!

You can go inside too of course, which I did on my last visit to Paris in the summer of 2012. I would have liked to have toured the glorious staircases and hall of mirrors like grand foyer again, but it wasn't to be in our packed schedule this trip. We arrived in Paris at around 4pm last Sunday (the 23rd), and after settling into our airbnb we headed over to see the opera house and visit the Galleries Lafayette flagship store on Rue Haussmann. As usual, I was a bit out of place in my huge ballerina worthy skirt, especially since extra tourists were crowded around a small marching band that had installed itself on the front steps. The marching band was rather loud and distracting actually, but one cant plan these things you know.

Still, even with hundreds of people milling around we still managed to get some great photos of the finished galaxy tulle skirt! I wore it over my black Malco Modes petticoat and black cotton sateen circle skirt for maximum volume. I wasn't quite sure what to pair with the skirt so I ended up wearing a lace top over my black Rago longline bra. A pair of dangling earrings in faux red jasper and brushed gold and my trusty black Marilyn's from Royal Vintage Shoes finished the look.

After prancing around the opera house we headed inside the beautiful 1912 Art Nouveau Galleries Lafayette department store with it's glorious stained glass dome and pretty floral balconies. I had wanted to get to the top terrace and take in the view of Paris from the roof, but unfortunately it was already closed for the evening so we ended up doing a bit of souvenir shopping in the kitschy touristy department instead. I had a pretty strict budget on this trip (have I mentioned I quit my job in Feburary?...well yeah, I did) but I did want to take the opportunity to pick up some new berets in Paris. I love beret hats and I always have a hard time finding certain colors here in the states, but I knew that since they are such common tourist souvenirs in Paris I would have no trouble finding any color I should like! They are super inexpensive at all of the cheapy souvenir stands all around town, but at the luxurious Galleries Lafayette they have nice 100% wool versions and fine linen blend options! So I picked up both an ivory wool and a flecked sage linen beret for the combined price of 12 touristy souvenir berets. I was definitely helped along to buy the light green linen one because I knew it would go so well with my new Lillian two tone shoes from Royal Vintage Shoes when they arrive in June ;) They will be my nicer berets, but I did end up with...umm...five more berets of the 3 for 10 euro touristy variety. The berets were my planned purchases though, it was the unplanned ones that put me way over budget, but more on those later!

I still want to write one last post about finishing up the galaxy skirt and lessons learned making it. It sure is fun to wear, and I felt a bit Carrie Bradshaw wearing it (in the best way). I'm sure you will see it again in the future! If only I had more occasions to wear such a thing! Perhaps I should make a silk  corset/ballet inspired bodice to wear with it in the future?

Skirt: Made by me
Top & Earrings: Old Navy
Longline Bra: Rago
Fishnets: Amazon
Shoes: Royal Vintage Shoes
Petticoat: Malco Modes

April 19, 2017

Sequins & Stars: Painting on Tulle and Sewing on Sequins


So when we left off I was creating appliques of planets to populate the void of my galaxy inspired black tulle circle skirt, but I ran up against a problem. Even with several planets and the little metallic star field rectangles I had made, there simply wasn't going to be time to use only sequins and beads to embellish the skirt to the level I wanted in the time I had left! I sewed the panels and appliques on, and then I had to figure out a new plan. I did mention I was trying to finish this skirt in time to pack it to wear in Paris right? Well...yeah. So knowing what I had learned about painting on tulle, I experimented a little further.

Sure painting on the tulle directly doesn't work in the way painting on paper or even regular fabric does, but it does create a shadowy imprint of the design you choose. This effect is of course created by the fact the the paint covers only the netting, and being so fine, and with so many spaces in structure, the result looks almost like you took the painted design and turned the opacity down to 10%. This is enough however for the design to still appear, especially if, like I did with the metallic painted rectangle sections, I could ensure some of the paint did fill in the windows of the tulle. Did any of that make a lick of sense? Perhaps photos will help.


First I put down some wax paper all over my big drafting table. Covering the table in regular paper wouldn't have worked as wet painted tulle would have dried sticking to the paper, and then when I peeled it off bits of paper would have stuck, and that would be bad! I mixed up some regular acrylic craft paints (its not like I will ever be washing this skirt!) and added a bit of gloss varnish to each hoping that would make them stay better and not flake off the tulle like perhaps matte paint would do once it dried.


Ah look how bright and defined that looks! Remember, you are looking at the artwork on the wax paper essentially, once you see it on only the tulle the design is much much fainter. I drew in a couple of distant galaxies and some general clouds of nebula spaced randomly around the circle shape of the skirt.


I even broke out some natural sea sponges that I used to use for watercolor painting ages ago! These worked super well for getting very organic and whispy nebula clouds. As you can see in the photo above I dotted on a few stars in with paint too even though I knew I would be adding sequin stars later as well.


Here is what the tulle looked like once the paint had dried. You can still see the painted areas, especially because my table is a dark color and a dark background helps the tulle almost disappear and the painted sections remain visible. Also you can see that where the tulle was two layers and already painted over the rectangle appliques the paint took better and came out brighter.


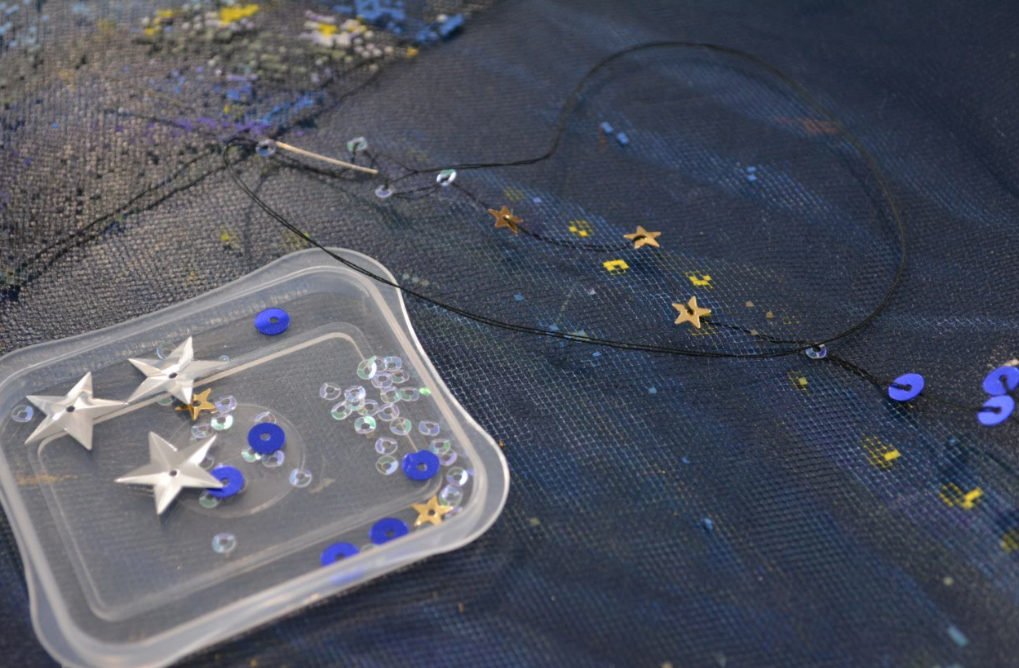
Then it was time to get to work sewing sequin stars all over. Shall I add up the hours? Hmm...lets say around 16-18 hours of sewing on sequins and beads! My back was killing me from leaning over this darn thing! Worth it though! At least I hope you will agree it was in the end. I listened to lots of lovely podcasts and for a few days had the Star Wars Celebration con live-stream on in the background. Apropos no? (Also that teaser trailer ahhhhh!)


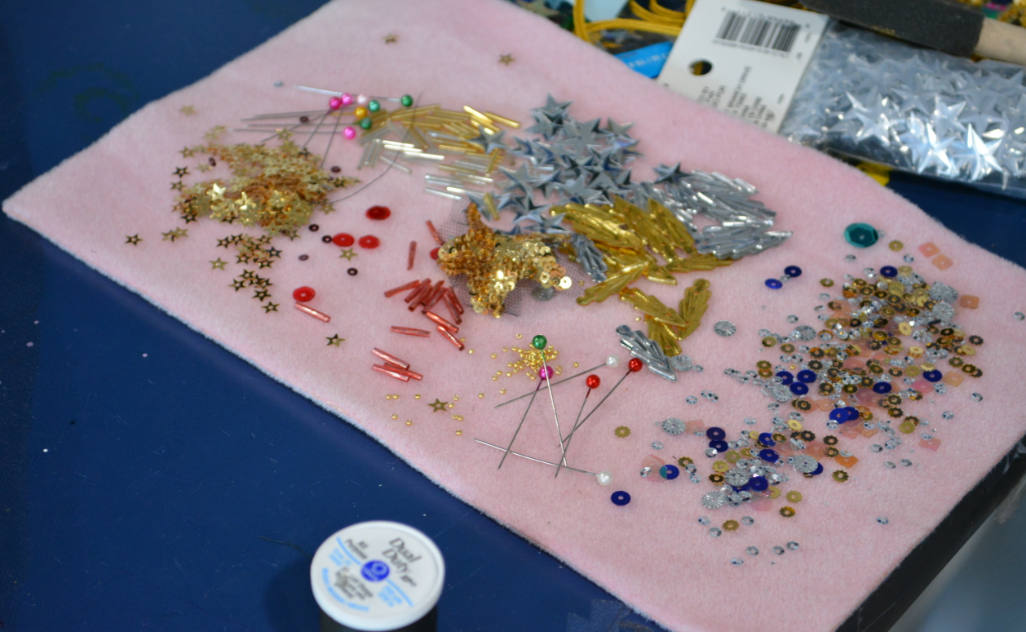
I sewed every sequin on by hand at this stage, using beads occasionally and to hold the centers of the larger sequins and star shaped ones. I should note that the large star shaped sequins are from Michaels crafts and come in packs of silver, gold or multicolor. They have some cool sequins at Michaels right now! Who knew? I tried to limit the colors and specific types of sequins I used to keep the whole skirt looking cohesive. Most of the little constellations were done with large silver stars and tiny gold ones as a repeated motif, though I used some tiny iridescent sequins and some deep blue metallic sequins for the galaxies.

Alas this is where I leave you for now, as I was rushing to finish the skirt! The good news is that I did indeed finish it in time to pack it in my luggage, so if all goes well (knock on wood) you should be seeing the finished skirt in photos soon :)


March 31, 2017

Sequins & Stars: Cutting out the Tulle and Embroidering Planets


Well after finishing the beaded bolero, I have made some progress on my planned galaxy inspired black tulle circle skirt! Before I can really get down to the rather daunting task of embroidering on all of the starts and scatterings of sequins, I had to cut out the layers of tulle and make the larger applique embellishments!

Before I even cut out the layers of the skirt, I decided to play around with painting some of the tulle metallic gold with acrylic craft paints. While it turns out painting tulle isn't exactly possible, I did discover a really cool effect by accident! If you dab on a lot of paint and then peel off the tulle net very slowly, the paint gets caught in the windows of the net like little tiny stained glass almost. I made a bunch of small rectangular strips in gold and silver using this effect and I think they will be great stardust/background galaxy filler for my skirt!


I did have to cut out the layers for the skirt eventually though, so I wrestled the tulle into submission and cut out 3 layers of circle skirt from really wide (108" wide I think it said?). Using super wide tulle means you don't have to have side seams in the layers of your circle skirt. See crudely drawn illustration below! Simply layer the wide folded (it comes folded off the bolt) as wide as your circle skirt pattern is "long" through its center. Layer as many times as you want for how dense you want your skirt. I cut mine at 3 layers of folded tulle (so 6 layers of net total but with the folds lined up). That was 6 yards of tulle by the way for 3 layers. I accidentally bought shiny tulle instead of matte, so I cut a 4th layer for my skirt out of 45" wide matte tulle since I had some in my stash. Since this matte tulle was only 45" wide this top layer of the skirt will have side seams, but I doubt it will be that noticeable in the end.


So above you see my top layer of this skirt laid out on the carpet so I can play around with how I want to arrange the galaxy of appliques and embroidery on top. I am in the middle of creating some sequin and bead embroidered planets for my fictional galaxy that I will cut out and sew onto the skirt tulle. Once these larger appliques are sewn on I will populate the galaxy with hundreds of sequin stars...but lets not think about that now as it is going to take ages!

Now you may be thinking I am a bit mad, and also that all of this would be much easier if I had a large embroidery frame (they certainly use big tambour frames for this type of work in couture), and you would be quite correct. Seeing as I only have small circle frames however...I'm doing the best I can!

Also my desk looks like this...


Beads and sequin everywhere! The silver moon (or wait...that's no moon!) you see in my embroidery hoop there is finished, but as it took way too long to bead so precisely, I will be using more simplified designs for the other planets!


I had never done tambour embroidery on tulle before and so far I am not a fan! Usually when making appliques you would use silk organza which is much stronger that this nylon (poly? I don't know what they use to make tulle!) tulle netting. Despite tulle being obviously much cheaper than silk, I would still much rather be using silk, but the only place that stocks it near me is 40 minutes away and I didn't want to make the trek! For those of you unfamiliar with tambour embroidery, it is done with a tiny needle sized hook that is much like a sharp crochet hook at a miniature scale. (I sort of wonder if anyone has tried to crochet with one of these before?) To embroider, or more often to sequin and bead, you work from the back side of the fabric and push up the sequins from underneath. You can only really do this on sheer fabric since you wouldn't be able to see what you were doing otherwise! Here is a video showing how tambour embroidery works. I was super lucky to take an introduction to tambour class at the Royal School of Needlework while I was studying abroad back in university. In fact the instructor in that video (Robert Haven) was the same instructor who taught my class at the RSN! I highly recommend embroidery classes at the RSN by the way, you get to sit inside Hampton Court Palace and embroider which makes the whole experience extra special!

So this has been the crazy galaxy sequin skirt update! Hopefully I will have more progress to show you all soon! Are any of you working on a crazy or long term project these days?


March 30, 2017

Lesage of the Rockies


There comes a time, every so often, when you just have to make something a bit impractical and over the top like a black wool pencil skirt...oh wait, no, I mean an embellished jacquard bolero!

The skirt is indeed a recent project as well, and I had been wanting a winter appropriate black pencil skirt for ages, but lets face it, it's not exactly the star of this outfit is it? I had some of this sapphire blue jacquard left over from when I made a wiggle dress out of it earlier this year, and I had a sudden surge of inspiration one afternoon to attack it with black lace and sequins! There are some gorgeous embellished jackets from the 1930s and 40s by Schiaparelli and Balenciaga and I thought perhaps with those fabulous boleros as my example for the style I could get away with something like this bolero in my retro wardrobe. I'll be wearing it with the matching dress soon to an event I have coming up, but I think it works with more sober black as well.

I wish there were such a place as a Lesage here along the Rocky Mountains, but alas my sewing room will have to suffice. I'm no couture embroider, but I'd love to take lessons at the storied school one day! For those who don't know what I'm on about, Lesage is a couture embroidery specialist atelier in Paris France who have worked with the major French couture houses for nearly a century, and now work with Chanel (and are indeed now owned by Chanel). Masion Lesage create the most spectacular embellishments and embroidery for haute couture collections and I highly recommend watching some videos of the artisan embroiderers at work for mega inspiration. I used all kinds of sequins for this bolero, but most were from Cartwrights including the matte black slightly cupped sequins that make up the larger flower shapes and the teeny tiny 2mm sequins that create the sparkle effect over much of the lace. The black lace itself is arranged motifs cut out from a length of faux alencon lace I bought years ago at Colorado Fabrics (back when it was called Denver Fabrics) fit around the neckline and fronts of the bolero. The kimono sleeved all in one style of bolero isn't really the best suited for this heavy sequining, as it creates folds around the armhole by the nature of the style, but I only had so much extra jacquard to work with!

Even though this little jacket was a ton of work, I had a lot of fun doing it and it feels so good to see it finished knowing I sewed on every single bead and sequin by hand. I'm a nutter for sure! Now I've moved onto the tulle galaxy circle skirt, which has a lot more space (ha! pun) to cover but the embroidery will be a lot less dense so it shouldn't be so bad. I'll get back to it then, I hope you have all had a lovely week!

Bolero & Skirt: Made by me
Top: Banana Republic
Shoes: Royal Vintage Shoes
Tights: Amazon
Earrings & Clutch: Vintage

Related Posts Plugin for WordPress, Blogger...