Showing posts with label Corset. Show all posts
December 11, 2014
The Late Victorian Corset: Finished (well nearly)
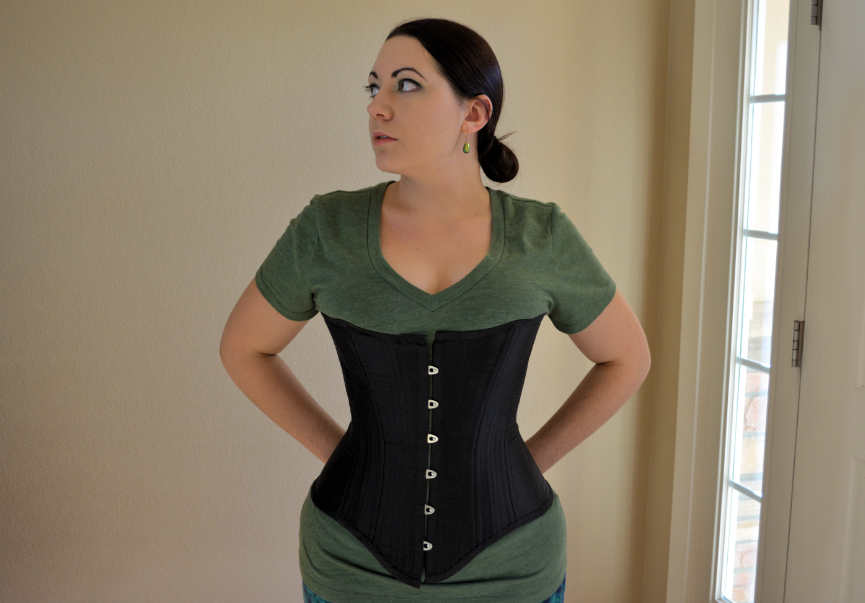
Well here is the corset! I still need to add flossing and some lace, but in general it is finished! I'm relatively happy with it, it is too big in the bust and hip overall, but for my first real Victorian corset I'm happy. I really like the shape this corset creates and it is quite comfortable! I'll make my next one smaller of course, but this corset will be a great starting point for jumping into late Victorian costuming next year.
Next up I'll be making a chemise to wear underneath, and hopefully I'll eventually add flossing and lace to the corset too. Sorry about the casual-ness of these photos but I was so excited it was finished that I just had to show it to you all asap!
December 5, 2014
The Late Victorian Corset: Part 4
The silk bias for the corset has been cut and ironed! Such a basic task, and yet one I have only just gotten to. I can happily report that one half of the corset is finished and bound! I will sew the other half of the binding on tonight and then all I will have left to do is the flossing!
I have been looking into different flossing resources, like this guide from Sidney Eileen and this library of flossing patterns from Foundations Revealed. I still want to use mint green thread on the smooth black silk of the corset for a nice contrast. Sadly I still haven't been able to find a lace trim I like for the top edge, though luckily that can always be added later. I have however bought some lovely vintage mint green silk ribbon for a center front bow!
It feels good to be nearly done with the corset now, though that means I need to make a chemise to wear underneath it!
November 24, 2014
The Late Victorian Corset: Part 3
I have been working diligently on the Victorian corset this week and have made a lot of progress! More progress than I have photos of actually, when you get going sometimes you forget to document these things! I have completed most of the final corset now, I just need to attach the binding and floss the boning channels. I still haven't found a good lace for the top edge, but seeing as that doesn't effect the function of the corset, I can keep looking.
I had hoped to find a herringbone twill to use for the strength layer of this corset, but I could barely find a heavy weight regular twill, let alone a herringbone one. I know I should just buy coutil (fabric specially woven for corsets) but I am impatient and cheap so I have never bothered to spring for it! I ended up going with a mauve-ish colored medium weight cotton twill. I of course didn't care what color the strength layer would be, it was all about finding something strong that wouldn't stretch much. I also bought some twill tape for making additional boning channels inside. Then of course I had to buy the steel boning itself, I ended up getting mostly spiral steel boning and some flat spring steel as they didn't have every pre-cut length I had wanted in the spiral available. I don't usually use spiral steel so I don't mind having this corset be half and half.
Putting the corset together went smoothly and I was pleasantly surprised I remembered how to insert the busk and finish the front edges from making the Edwardian corset last winter. It seems silly now I was so afraid of using busks when they are actually no trouble at all! I have my eye on a busk with gold plated hooks and pins for another corset down the line (magenta with a gold busk and gold flossing!).
As of now, I have inserted the grommets down the back and inserted all of the boning into the channels. The next step is always the most nerve wracking, trying the darn thing on! Luckily, it fits, at least it isn't too small! It isn't really too big either, I just wish I had taken off another inch all around because, drum roll please, the edges do meet in the back when laced up! I had modified the pattern, removing about a half inch, and hoped between doing that and the stiffer fabric everything would have shrunk a bit more, but alas it is still a bit too big. But other than my nit pickyness about the lacing closing, it fits rather well. I am really happy with how the bust area fits/supports the top. The shape it creates is really pretty and will be great for my bustle era projects planned for next year.
Because it is a bit bigger than I would like, I don't have as much waist reduction as I had hoped. Resting I have about a 31" waist and this corset can only take me down to a 29" at best with the back fully closed. I plan on making a second corset for "evening" wear that is smaller and can get down to a 28-27" waist. Even though my waist measurement is not greatly effected by this new corset, it does look much smaller because a corset makes your waist much more round as opposed to the more oval shape of the body naturally. So though the measurement is the same, the shape makes the waist appear smaller. So that's always a nice effect :)
I hope to finish attaching the binding and get going on the flossing this week so that I can show you all the finished corset! I'm off to the sewing room again...
November 17, 2014
The Late Victorian Corset: Part 2
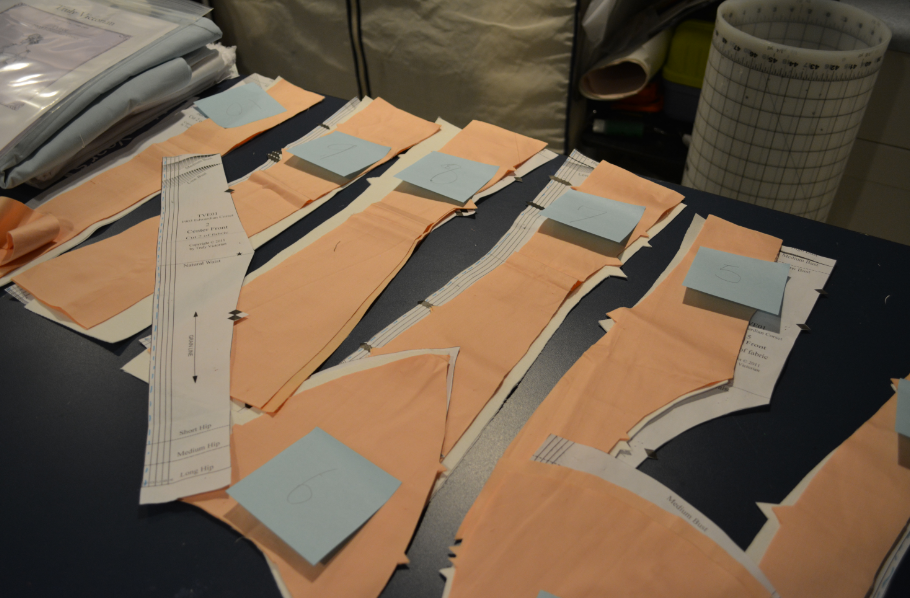
So, when we left off I had discovered the Corsets and Crinolines pattern was exactly 10 inches too small for my measurements. I was all worried that I had a lot of math to do. In actuality, this was the best discovery I could have made because it made re-sizing the pattern very simple! Since proportionally the corset was perfect for me, a 10" difference between the 30" bust and the 20" waist was the same as the 10" difference between my 40" bust and 30" waist. I decide to see if that meant all I had to do was add a half inch to each side of each pattern piece. One inch added per pattern piece, 5 pattern pieces, 5 additional inches per side of the corset equaling the ten extra inches I needed! Easy math is my favorite kind :)
Here is the pattern after I added the 1/2 inch to each side, another 1/2 inch for seam allowance and then 1 inch to the top and bottom of each piece to play with how tall/long the corset would be. I like to be extra methodical with corset making so I don't screw anything up, so you can see I have numbered and highlighted the top of each piece in blue.
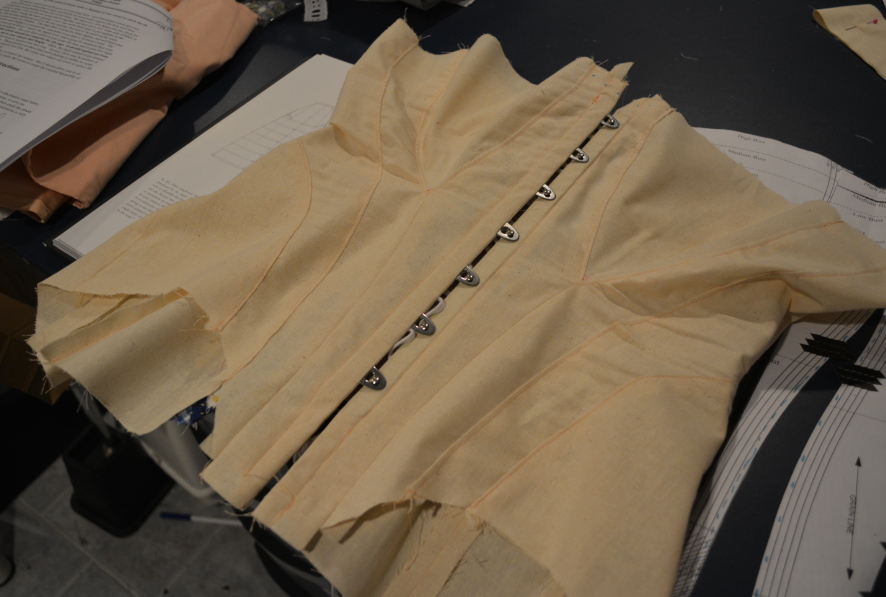
Measuring the new pattern resulted in the measurements matching my own quite perfectly. The waist of the first pattern turned out to be a little less than 20", which was fine as I would like the new measurement to be around 28". Some waist reduction is always nice! I decided to dive in and try on a very basic mock-up of my new pattern.
So here is the mock-up. Made of only one layer of thick muslin, I know it is not a perfect representation of how the corset will behave when made of a stronger material. I did add boning at the seam lines, inserted the busk, and added a grosgrain waist tape to approximate some of the final structure. I basically made this mock up to test if the pattern would work at all. Miraculously, to my surprise and delight, it was nearly perfect! The corset fit very well, other than the fact that it closed in the back, which I have to imagine will no longer be the case when it is made out of a stiffer material than the muslin which stretches more than a coutil or twill will. I am hoping when I make the real corset that the thicker and stiffer fabric will mean the whole thing shrinks just a bit. I may take off a 1/4 inch somewhere in the pattern too, just too be sure it doesn't meet in the back. There is nothing wrong with having your corset meet at the lacing in the back, it just isn't as historically accurate and allows less room for adjusting just how tight or loose you want to be laced.
I also redrew the lines at the top and the bottom of the corset, as you can see with a blue marker above. Mostly I had to remove the one inch allowance I had added to the pattern for adjustment.
I know it is a bit of a risk not making a second mock up out of twill (hopefully I can find a herringbone twill) to see just how much a stronger (less stretchy) fabric changes the fit of this corset. The pattern went together so easily that I won't be too terribly bothered if this corset somehow comes out too small or too big and I have to make another. Its not like stay making where you have to sew a trillion straight lines only to afterwards find out something is wrong and it won't fit! That is true frustration!
In fact this corset goes together so easily I am already thinking of making another one if this one works out. I should make a summer corset next but I am leaning towards a bright colored satin instead just for fun! Today I am off to the fabric store to buy twill, boning, and hopefully a nice black cotton lace for the top edge. Look for another corset update later this week!
November 13, 2014
The Late Victorian Corset: Part 1
So its time to construct a new corset! I have been making "corsets" for a long time now and by that I mean, I made boned corset-like bodices a lot when I first started sewing. Then I became crazy obsessed with the 18th century and switched over to stays. So I have mostly made stays since I switched over to more accurate historical sewing, meaning I have never actually made a proper Victorian corset. What?! how have I made it this far in life without a Victorian corset? I may never know. Busks always terrified me, I didn't have a clue how to sew one into a corset. Also I would have had to order one online as no where in Colorado sold them!
I finally overcame my fear of busks and learned how to sew a "real" corset last Spring when I made my Edwardian corset. I used the most excellent Truly Victorian Edwardian Corset pattern which luckily fit me perfectly right out of the gate. I followed their instructions very closely, made a mock-up first, and the resulting corset is one of my favorite things I have ever made. That said, it won't work for bustle era costuming, so its back to the sewing room!
Seeing as I had such a good experience with the Truly Victorian pattern I came really close to ordering their basic late Victorian corset pattern. What stopped me was just how generic the pattern seemed to look, it didn't have the pizzazz or the crazy hourglass waist definition I was looking for. After all, back when women wore corsets everyday, there was a huge variety to choose from and also the very real option of just having them made to order for your exact shape. These were essential everyday garments, not one off special occasion pieces or something that had to last through one night at a costume ball.
So I looked at other commercial patterns, I looked through my costuming books and then finally I looked through Pinterest. What I really wanted was a corset just like Merja's (of Before the Automobile fame, drop dead gorgeous costuming). Luckily she says in that post which pattern she used for the corset, the late 1880's corset pattern in Corsets and Crinolines by Norah Waugh. Now sadly I don't own this particular costuming tome, but luckily this particular pattern is floating around the internet!
![]() |
| found on pinterest |
So having decided on a pattern I first had to scale the pattern up from its minute size on the bottom of this page. I used the drawn ruler guide as my sizing guide and printed the pattern to actual scale over six pieces of 8.5x11 computer paper.
Soon I had the pattern from the book scaled to actual size and was ready to measure and see just how tiny this extant corset had been...
Measuring the corset's waist it was just 20.5 inches! Woah that is a tiny waist! The bust and hips came out roughly to 30.5 inches which are also tiny. My measurements are pretty much all around 10 inches greater than this corset pattern which mean I have to seriously re-size this pattern for it to fit me. I knew I would have to make adjustments but 10 inches is a lot of room for error! So its lucky I found this master class by Cathy Hay (of Your Wardrobe Unlocked) that explains how to size a corset pattern to your own measurements using a fair share of math. I don't particularly like math much so we will see how it goes.
The plan is to re-size the pattern to something workable and make a muslin that I can draw on and correct to really finesse the pattern into one that works for me. I would love to end up with a great Victorian corset pattern that I could re-use to make more corsets down the line. For this first one, after the mock up of course, I'll be using some leftover black silk and I want to use mint green flossing and silk ribbons as accents. When I eventually make a bustle I'll use the same mint green for a cute set of Victorian under clothes! I really am excited to dive into bustle era costuming in 2015!
February 26, 2014
Corsets and Stays
I realized I never got any good pictures of the peachy Edwardian corset, and these aren't much better really! I tried, a while back, to get pictures of the corset on me but those turned out a bit too risque for the internet despite my best efforts to be prim. Corsets are underwear after all! But here are a few more pictures of my pride and joy!
| The dress form is no where near curvy enough for this corset! |
| which gives the corset a rather ugly uneven lacing gap, but on me I promise it fits like a glove! and there's the brocade dress I'm working on behind ha ha |
Next for me on the corseting front are two more Victorian styles! The first will be an overbust Victorian style from the 1880's like the one below only in a marbled print cotton I fell in love with at Joanns.
And then a modern-ish underbust corset in this valentines-tastic red and pink poly brocade again from Joanns.
And of course I am still finishing my latest pair of 18th century stays! The binding is almost over, thank goodness, and then all I will have left to do are the hand bound eyelets! Oh stay making, not my favorite activity!
January 17, 2014
The Edwardian Corset
![]() |
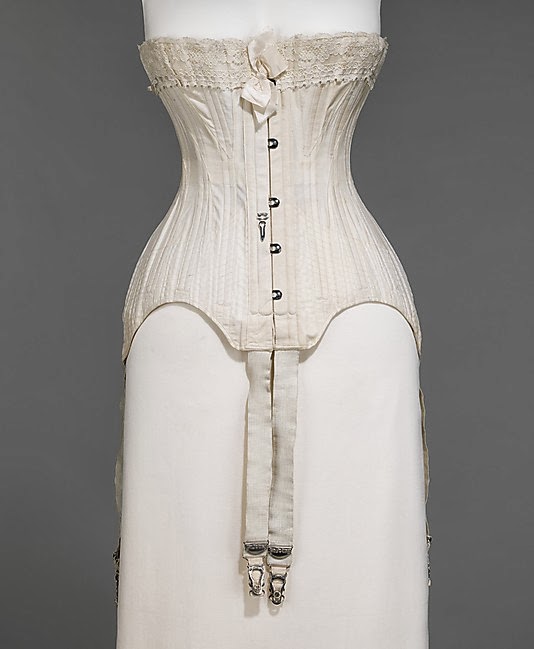
| Corset 1905, MET |
When I first saw the perimeters for this years Your Wardrobe Unlocked competition I knew exactly what era and design I wanted to conquer. I had never attempted Edwardian costuming before and though I have been making corsets of varying degrees of accuracy and success over the last perhaps eight or ten years (yes I learned to sew young), I had never undertook a corset with a busk or with the level of historical accuracy as I was about to attempt. Knowing I shouldn't try and just wing it when it came to the pattern I ordered Truly Victorians 1903 Edwardian Corset pattern. When I had the pattern pieces cut out I was intimidated.
The pattern turned out to be brilliant, the size (size E in my case) was perfect and the instructions were easy to follow as I hung onto every word trying not to screw anything up. I decided to make a mock-up out of muslin to try inserting a busk, as I had never done it before, and to better understand how the pattern fit together so i wouldn't screw up on the real one. This was super helpful and made putting together the real corset so much easier and a bit less nerve racking.
| The muslin corset mock-up |
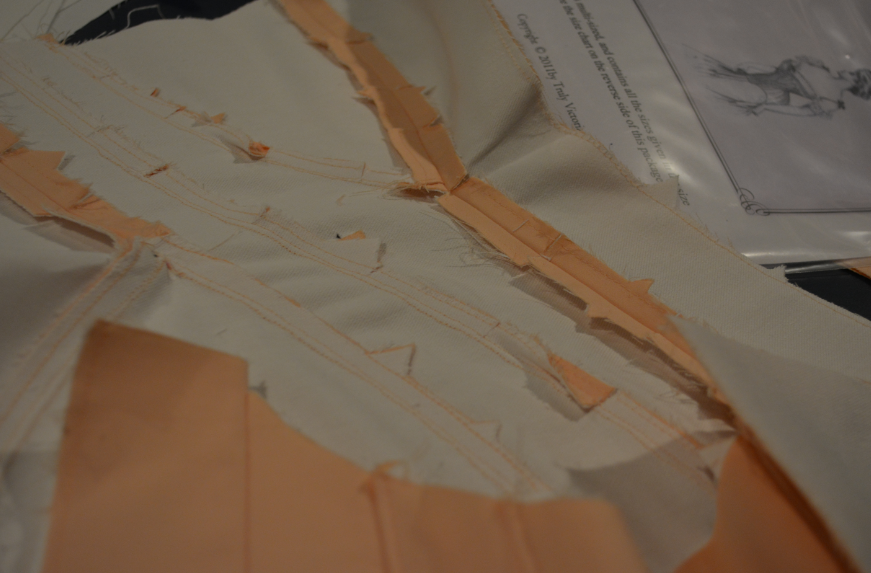
After the success of the mock-up I cut into my real fabrics, a peach cotton sateen that I had gotten for free at school a long time ago and a sturdy cotton twill from Denver Fabrics. I decided to baste these two layers together to make sewing the panels together less evil.
| note my sticky notes numbering the pieces so I didn't get confused |
| by this point I was really loving the peachy sateen, even though I don't normally like the color peach it was just perfect for an Edwardian corset |
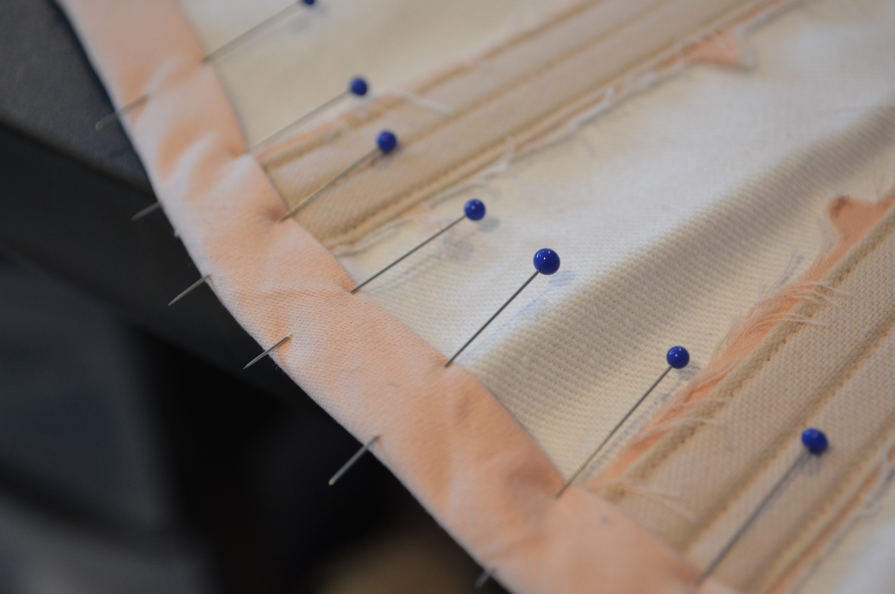
| sewing on the bias binding was satisfying beyond belief knowing I was nearly done! |
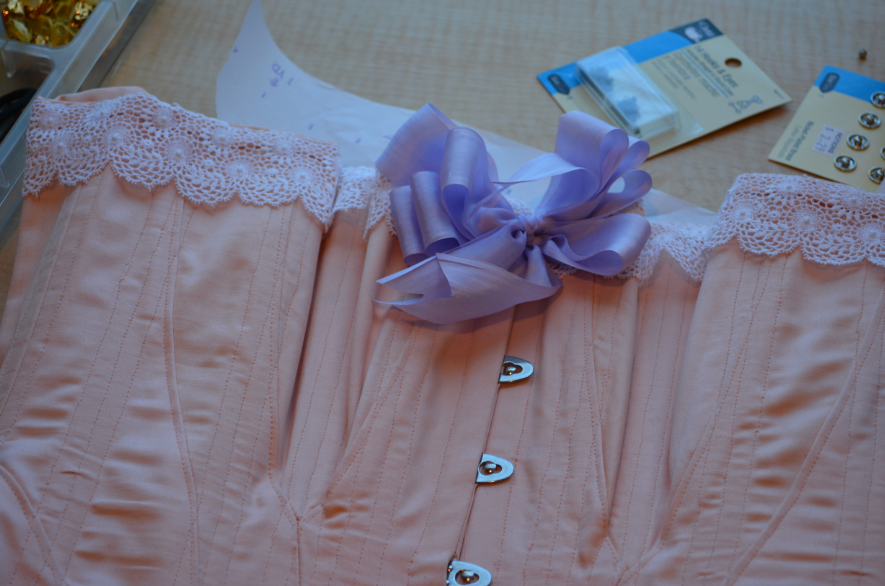
Then suddenly, after two days of careful sewing, the corset was finished! The last steps were finishing the top edge with some pretty cotton lace I found at Denver Fabrics and a gorgeous floaty silk ribbon I bought on Etsy especially for the finishing touch of this corset. I love this corset. Not only am I just super relieved it came out well but it fits perfectly and looks great on, what a fun new silhouette for someone used to 18th century stays! I will have pictures of the finished underwear set for you soon, I managed to finish the corset, chemise/slip and petticoat all in four days and so now I have dove headfirst into the gown to go over-top everything else. This will be my first time entering the contest at Your Wardrobe Unlocked and I am so excited but wish I had given myself more time of course!
Subscribe to:
Posts (Atom)