

So when we left off I was creating appliques of planets to populate the void of my galaxy inspired black tulle circle skirt, but I ran up against a problem. Even with several planets and the little metallic star field rectangles I had made, there simply wasn't going to be time to use only sequins and beads to embellish the skirt to the level I wanted in the time I had left! I sewed the panels and appliques on, and then I had to figure out a new plan. I did mention I was trying to finish this skirt in time to pack it to wear in Paris right? Well...yeah. So knowing what I had learned about painting on tulle, I experimented a little further.
Sure painting on the tulle directly doesn't work in the way painting on paper or even regular fabric does, but it does create a shadowy imprint of the design you choose. This effect is of course created by the fact the the paint covers only the netting, and being so fine, and with so many spaces in structure, the result looks almost like you took the painted design and turned the opacity down to 10%. This is enough however for the design to still appear, especially if, like I did with the metallic painted rectangle sections, I could ensure some of the paint did fill in the windows of the tulle. Did any of that make a lick of sense? Perhaps photos will help.

First I put down some wax paper all over my big drafting table. Covering the table in regular paper wouldn't have worked as wet painted tulle would have dried sticking to the paper, and then when I peeled it off bits of paper would have stuck, and that would be bad! I mixed up some regular acrylic craft paints (its not like I will ever be washing this skirt!) and added a bit of gloss varnish to each hoping that would make them stay better and not flake off the tulle like perhaps matte paint would do once it dried.


Ah look how bright and defined that looks! Remember, you are looking at the artwork on the wax paper essentially, once you see it on only the tulle the design is much much fainter. I drew in a couple of distant galaxies and some general clouds of nebula spaced randomly around the circle shape of the skirt.

I even broke out some natural sea sponges that I used to use for watercolor painting ages ago! These worked super well for getting very organic and whispy nebula clouds. As you can see in the photo above I dotted on a few stars in with paint too even though I knew I would be adding sequin stars later as well.

Here is what the tulle looked like once the paint had dried. You can still see the painted areas, especially because my table is a dark color and a dark background helps the tulle almost disappear and the painted sections remain visible. Also you can see that where the tulle was two layers and already painted over the rectangle appliques the paint took better and came out brighter.
Then it was time to get to work sewing sequin stars all over. Shall I add up the hours? Hmm...lets say around 16-18 hours of sewing on sequins and beads! My back was killing me from leaning over this darn thing! Worth it though! At least I hope you will agree it was in the end. I listened to lots of lovely podcasts and for a few days had the Star Wars Celebration con live-stream on in the background. Apropos no? (Also that teaser trailer ahhhhh!)

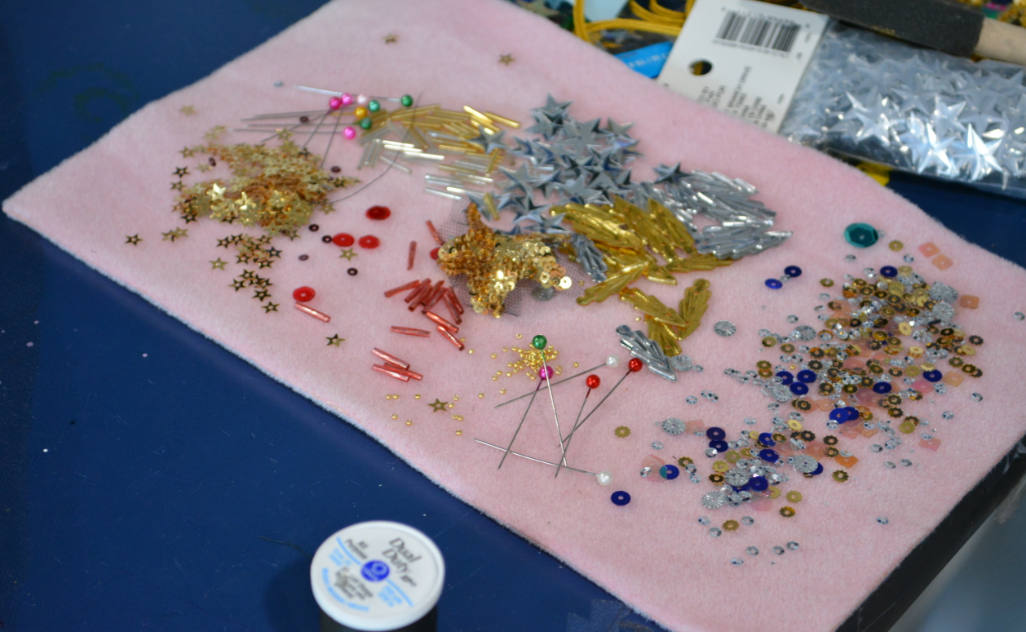
I sewed every sequin on by hand at this stage, using beads occasionally and to hold the centers of the larger sequins and star shaped ones. I should note that the large star shaped sequins are from Michaels crafts and come in packs of silver, gold or multicolor. They have some cool sequins at Michaels right now! Who knew? I tried to limit the colors and specific types of sequins I used to keep the whole skirt looking cohesive. Most of the little constellations were done with large silver stars and tiny gold ones as a repeated motif, though I used some tiny iridescent sequins and some deep blue metallic sequins for the galaxies.
Alas this is where I leave you for now, as I was rushing to finish the skirt! The good news is that I did indeed finish it in time to pack it in my luggage, so if all goes well (knock on wood) you should be seeing the finished skirt in photos soon :)

Argh! I was reading thinking, "I can't wait to see this, it's going to look amazing" and then you tell us we have to WAIT! You tease.
ReplyDeleteSo sorry! How could I not save taking photos for Paris?! This project deserves it ha!
DeleteGood luck finishing it in time for Paris! I can't wait to see it finished - and photos of Paris! Have a good holiday, too, by the way. :)
ReplyDeleteThanks Ellie! Photos coming very soon ;)
DeleteSo looking forward to seeing the big reveal of this project!
ReplyDeleteThanks Kate-Em! They will be up just hours from now ;)
Delete