
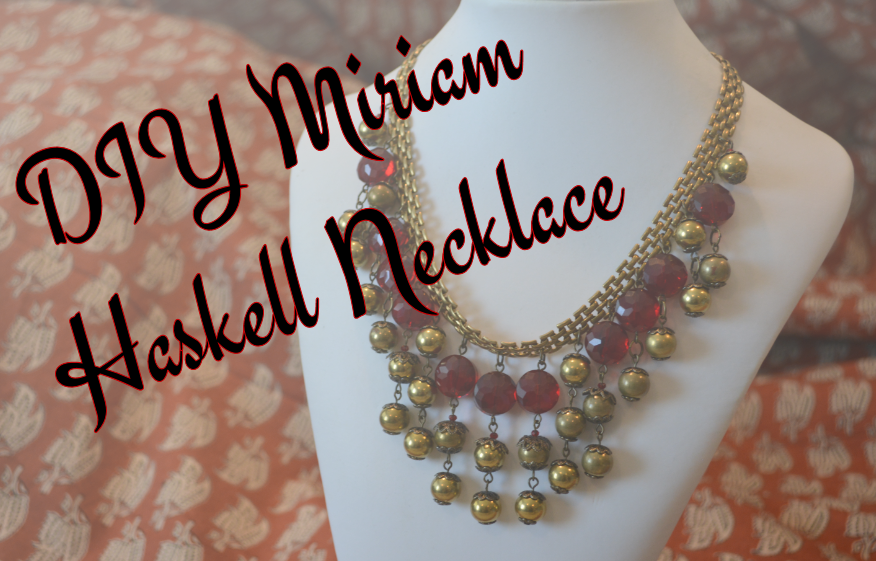
A little while ago I told you guys about how I finally watched the Aviator and fell in love with a certain necklace (here) and was thinking of DIY-ing something similar. The necklace used in the film is probably a real Miriam Haskell necklace, but my budget is not quite the same as a movie studio so I knew if I wanted a Haskell's necklace, I was going to have to DIY it!
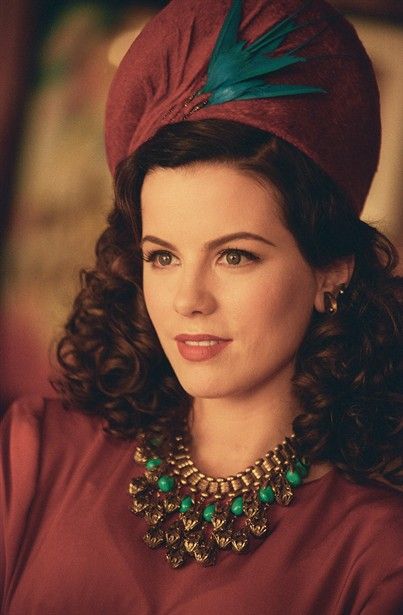 |
| The lovely Kate Beckinsale wearing said necklace! |
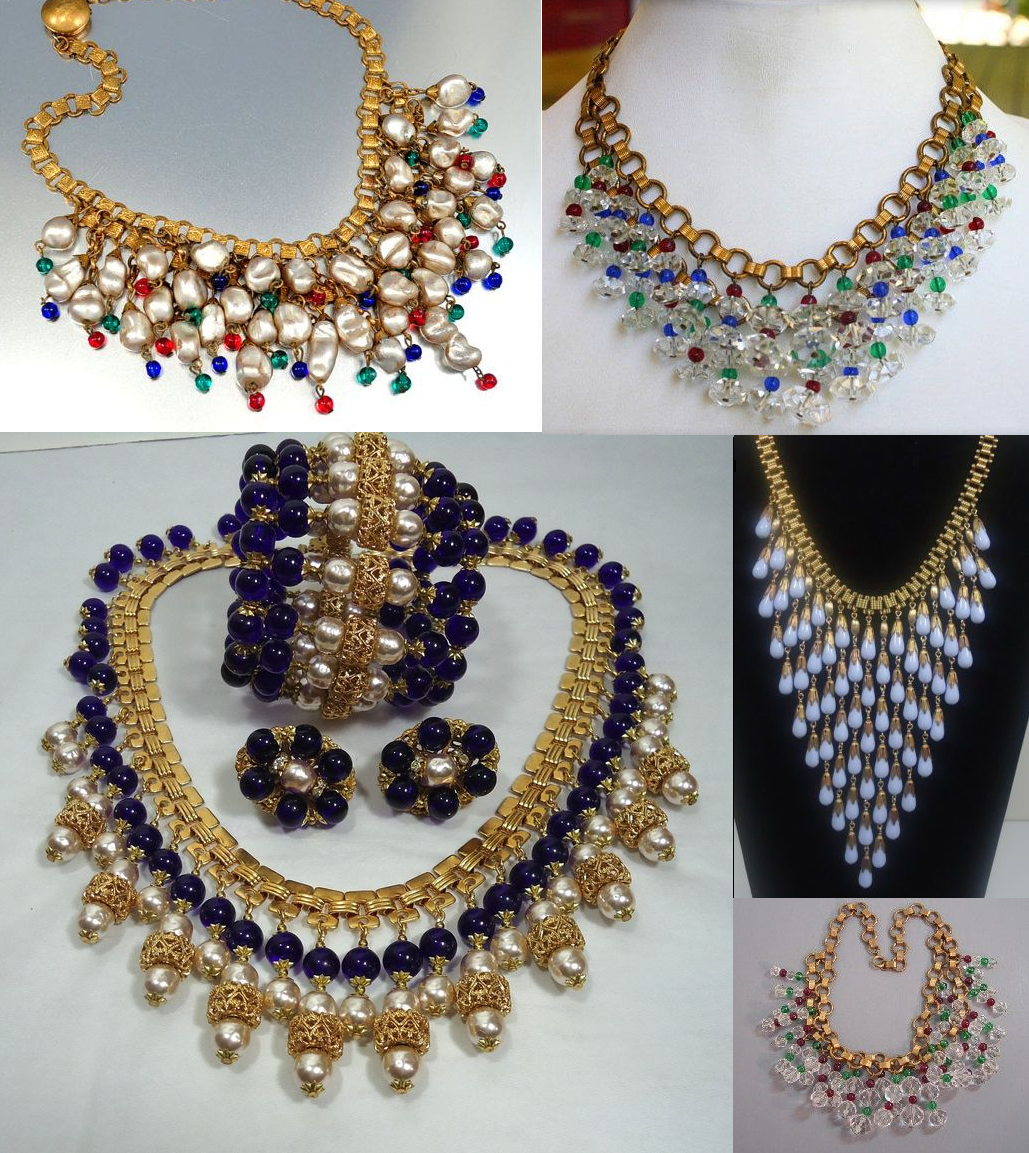
Here are some real Miriam Haskell necklaces. This is actually a very easy necklace to put together, it's in choosing the materials that you can ensure the end result looks like a Haskell's original. As you can see in the above originals, primary colors, clear glass, and natural colored pearls are common beads used in the style. The chains are of a larger scale and often a style of chain called book chain is used. The chain and findings look to be raw brass or perhaps gold plated. Browse pinterest and find some original necklaces to base your repro necklace on.

The materials you will need:
-Larger scale chain in a brass finish, at least 14 inches or so to go around the neck
-Headpins
-Eyepins
-Jump rings
-Clasp
-Bead of various colors or styles
-Filigree bead caps (optional)
-Round nose pliers
-Jewelry wire cutters
I bought nearly all of these materials at my local Joanns (and they were having a sale!) but I had to order the boxy chain and brass beads from Etsy. Search for raw brass to find similar materials.

I decided to go with antique brass finished findings as opposed to shiny brass. I wanted the finished necklace to have a tarnished "real vintage" look even though it is brand new!


Putting together the necklace is actually quite easy and involves a single process repeated. For the first row of dangling beads, thread them onto eyepins.

Fold over the excess wire and use your round nose pliers to create a loop on the other side.


Use this same motion for each of the beads that will dangle from the first row off the chain. Use headpins to create dangles to hang from the first row of beads. You can have as many beads in the middle as you like, some Haskell's necklaces have very long drops so make your necklace as long as you wish.

Cut your chain to the length you want and lay it out flat to play with your beads and figure out the layout you want. I think it is easiest to start in the middle when attaching the beads. Attach the strung beads to the chain with jump rings

Continue adding beads along the chain and then add the next row of beads to the first.

I did three beads in the middle of the necklace and then taperd to just two beads along the ends of the sides.
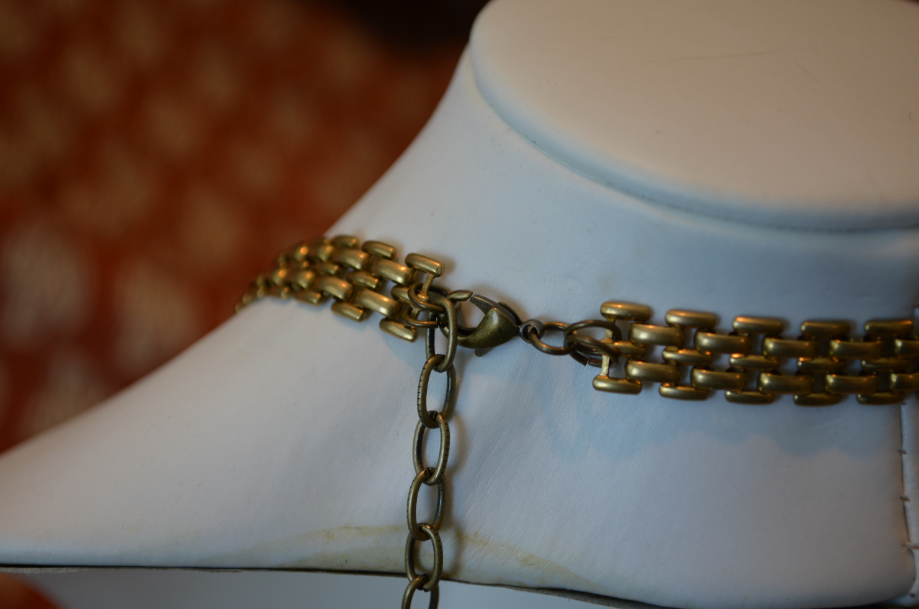
To finish your necklace, use jump rings to attach a clasp (and a chain extender too if you like) to the ends of the necklace.

Make some matching earrings with some extra beads and the same technique you used for the necklace.
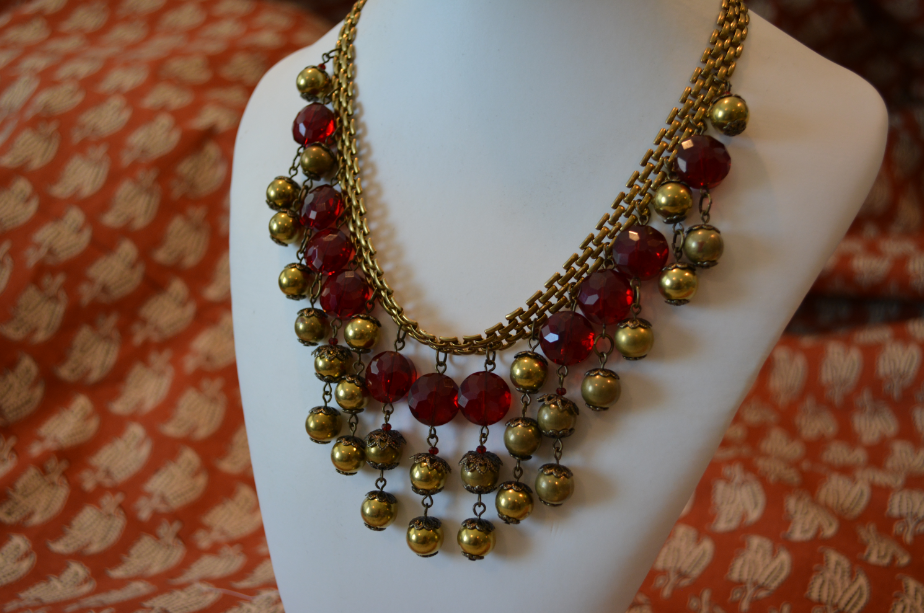

Then you are suddenly finished! Your hand will now hurt from so much repetitive motion cutting off the excess ends of the pins! Sorry about that :) For your efforts you now have a rather accurate looking Miriam Haskell necklace! Toss on your favorite 40's outfit and hit the town!

Lovely! Just like the inspiration :)
ReplyDeleteThanks Siri! I'm glad you think so, I need to figure out an outfit to wear with it now :)
DeleteThis is simply breathtaking! Incredibly job, sweet Bianca. I am beyond doffing my hat at you and will definitely be sharing this is an upcoming Vintage Link Love post. It needs to be seen far and wide!
ReplyDelete♥ Jessica
Thank you Jessica! I would be honored as always to be included :)
DeleteOh, that jewelry is beautiful, and very, very colorful! I think you've done a super job with your inspiration piece, it looks lovely. Thanks for the tutorial! ❤
ReplyDeletexox,
bonita of Lavender & Twill
Thank you Bonita!
DeleteA really amazing job, I was looking forward to this tutorial and it exceeded my expectations!! Well done, you've made it look really easy too xx
ReplyDeleteThanks Porcelina! It really is quite easy, just a bit time consuming!
DeleteGreat job, it looks really good!
ReplyDeleteThanks Kate!
DeleteI must say you have provided, within a few simple photos, information and techniques I would normally acquire after spending hours in a jewelry making class! I am a 57 year old male estate buyer, with pounds of vintage jewelry parts. Now I know what to do with it all!! Etsy here I come! Thank You!
ReplyDeleteWhile researching a rare Haskell necklace, I found your fantastic site. Thank you so much Bianca, for teaching me within a few photos techniques I otherwise would have needed hours in a class to learn. I am a 57 year old male with arthritis, so my doc says find a hand exercise. I own an estate sale company in the DC area, and many times I purchase entire estates. Over the years I've held on to pounds and pounds of vintage jewelry and parts. I believe you have opened my eyes to a new exercise, and maybe a new business hobby...Etsy here I come!
ReplyDeleteThank you for your most lovely comment David, I am glad to have been of help! Happy jewelry making! :)
DeleteIncredible job you did. Worrying that it is too difficult for me. Thanks for posting such wonderful necklace making tutorial.
ReplyDelete