

I know I mentioned my new nails specific tumblr earlier, but I still have another nail related post for you all this week! I decided to give carrara marble style nails a try, and I actually really like the result! These are super easy to do and very hard to mess up using this technique.
Materials:
-White and Grey nail polish (I used China Glaze White on White and Maybelline Audacious Asphalt)
-Black and White striping polishes (or a very thin paintbrush and regular nail polishes)
-Ziploc or equivalent bag
-Gold nail polish (optional)
-Clear top coat

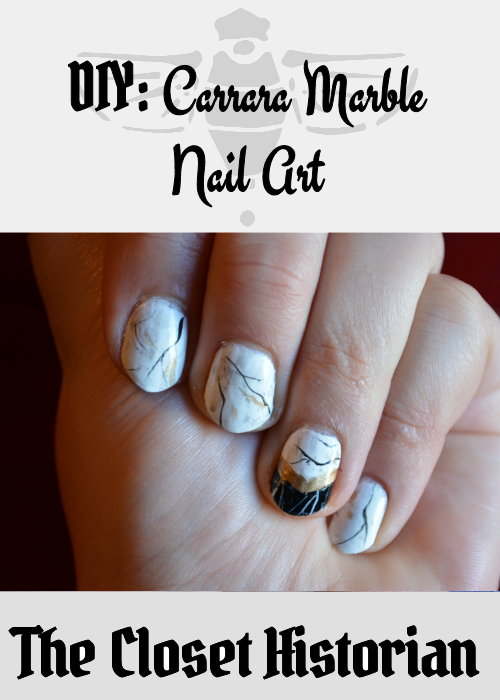
Start by painting your nails white, though I suppose this same technique could be used to create any color marble (like black or green etc.).

I added a chevron of black to my accent nail just for fun!

Take the Ziploc bag and crumple it up to use as a sort of sponge.

Paint some light grey polish onto the crumpled bag.

Sponge the grey onto your nails with the the bag.

Now use striping polish in black (and white for the black marble) to draw on a few veins in the 'stone' print on your nails. The more wobbly the lines are the better it will look so for once shaking hands is helpful in nail art!

Add clear topcoat and your done! I also added a stripe of gold metallic polish between the two marble colors on my accent nail and then dotted on a tiny bit of gold on my other nails for that sparkling mineral look.
Overall I am excited to try this idea again with other colors or as a base for stamping. I like the idea of having a multicolored marble tile look on my nails so I will probably try that next. For more of my nail art adventures check out my new nail tumblr The Historian's Nails!


That zip-lock bag technique is seriously cool! I hadn't seen that before. Thank you for sharing another marvelous nail tutorial with us, dear gal.
ReplyDelete♥ Jessica